GOM CamUser Guide
Lecture Recording
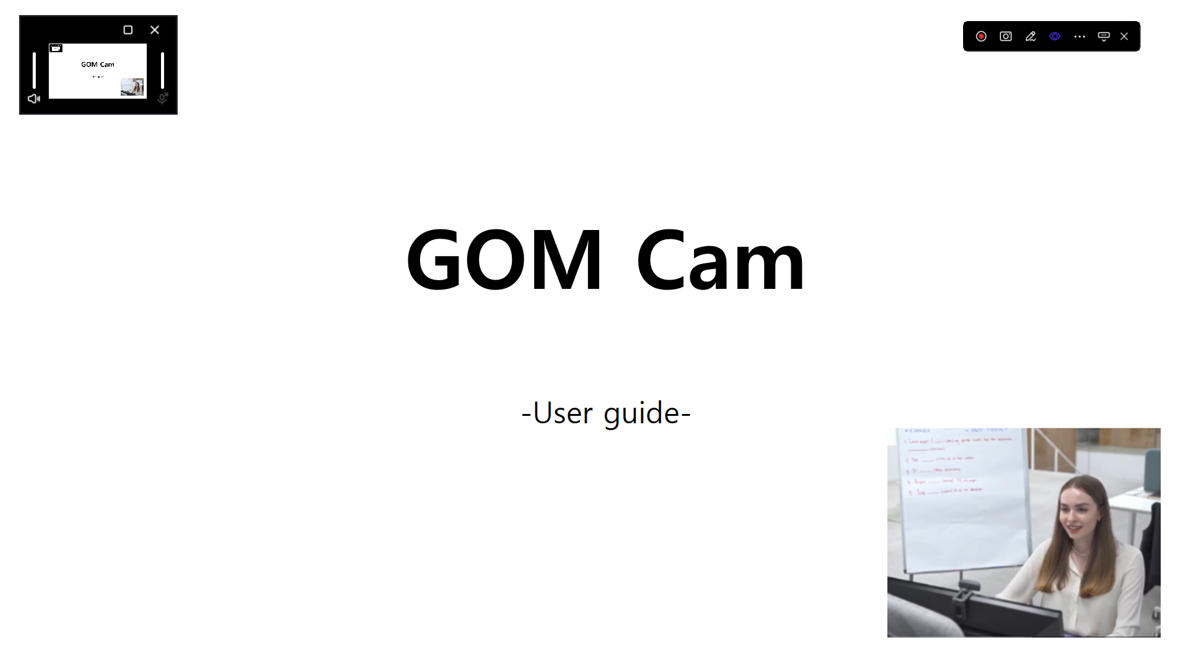
Lecture recording is a feature that allows you to create lecture videos by playing PowerPoint, HanShow, and PDF documents in slideshow (full-screen) mode, along with webcam screen, microphone voice, audio, and more. After you select the document you want to record and set up the device you want to use, the slide show starts and exposes the lecture recording toolbar.
1. Toolbar Before Recording

Start Recording

|
You can start recording. |
|---|---|
Image Capture

|
It allows you to capture the screen displayed in the recording area as an image. After adding the effect using the drawing tool, it will be saved as an image file with the effect added when captured. |
Drawing

|
It offers drawing tools to which you can add various effects. When clicking, a drawing toolbar appears, allowing you to draw on the screen and add shapes, stamps, text, and more. |
Preview

|
You can open and close the Preview pop-up, preview the screen that is being recorded. In the Preview, you can check the audio, microphone volume, and mute the sound and add effects. You can see the added effects on the Preview screen. |
Additional Features

|
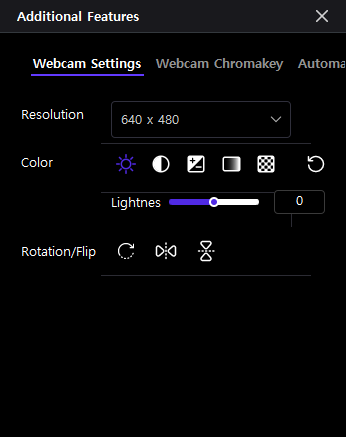
You can open and close the Additional Features pop-up, and you can turn on/off Additional Features according to each recording menu. |
Hide Recording Toolbar

|
Hide the recording toolbar and show only the recording area. Click the GOM Cam toolbar icon  in the taskbar (system tray) and the recording toolbar will reappear. in the taskbar (system tray) and the recording toolbar will reappear. |
Close

|
The recording toolbar will close and the home screen will appear. |
2. Toolbar During Recording

Pause
 Resume 
|
You can pause the resume recording. During a pause, the [Pause] icon changes to the [Resume] icon, and clicking the icon resumes recording. |
|---|---|
End Recording

|
You can end the recording. The recorded file will be saved automatically. |
Recording Time

|
You can check the recorded time in real time. |
Close

|
Close the recording toolbar and the home screen will appear. If you click the icon while recording, the recording you have made so far will be saved. |
3. Record Lectures
Try recording your lectures in the following order.
-
①
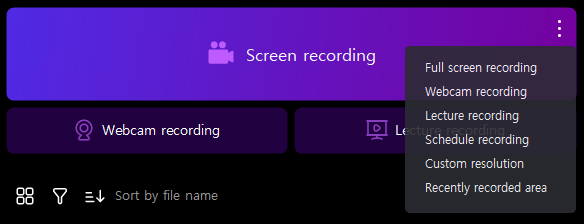
On the home screen, click the [More] button at the top right of the [Screen Recording] button, and click the [Lecture Recording] button.
Or, click the Lecture Recording button below the Screen Recording button
-
②
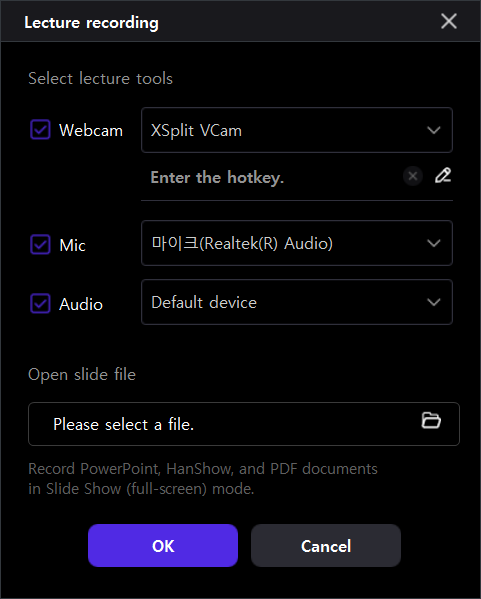
Select the device you want to use among the following: webcam/microphone/audio. Also, select the document you want to use as the course material then click the [OK] button.

-
③
The lecture screen and recording toolbar will appear

-
④
Click the [Start Recording
 ] button to start recording.
While recording, you can click the [Draw
 ] button to decorate the video.
Additionally, you can click the [Set Effect
 ] button in the [Preview] pop-up to add a webcam, image, and text. You can check the added effect in the Preview pop-up.
Click the [Additional Features
 ] button to set up the webcam or apply the webcam chroma key effect. You can also set up automatic shutdown.
-
⑤
When you finish recording, click the [End Recording
 ] button to end the recording.
-
⑥
Click the [Close
 ] button to bring up the home screen. You can check the recorded video files stored in the explorer area right away.
