GOM CamUser Guide
Basic Configurations
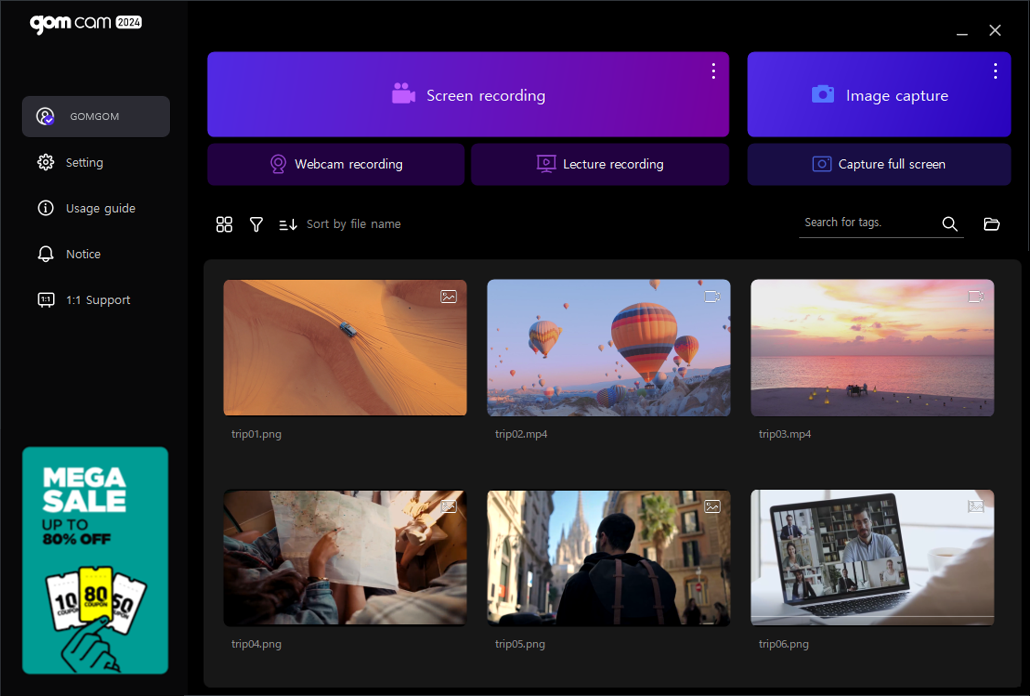
The home screen is the first screen that is exposed when GOM Cam is launched, and it consists of 4 areas: the top bar, menu, recording and capture, and explorer area.

1. Top Bar Area
The top bar area is where you can check the version information and proceed updates.
2. Menu Area
The menu area which is located on the left side, consists of account information and service required menus.
3. Recording and Capture Menu Area
The recording and capture menu area is where you can click each button to record your PC screen or capture an image.
You can record as a video or capture as an image by clicking the [ Screen Recording] or [
 Image Capture] button then specifying an area with your mouse. If you click the [More
  ] button located to the right of the [Screen Recording] and [Image Capture] buttons, you can use various recording and capture functions.
The most recently used record and capture menus will be added as new buttons under the [Screen Recording] and [Image Capture] buttons for quick access.
4. Explorer Area
The explorer area is where you can check the videos you have recorded and the image files you have captured.
For the video file, if you hover your mouse over the thumbnail, you can see additional menus such as [Extract Audio  ], [Edit Video
  ], and [Share
  ].
].

For image files, you can use functions such as [Share  ].
].

