GOM MixUser Guide
Timeline Panel
Timeline Work Area
In this area, you can move or edit clips.
1. Select Clip
Click a clip moved into the timeline work area with the mouse to select it. ![]() frame will be created for the selected clip. Double click text/object clips with the mouse to launch the [Edit Properties] window. Or double-click other clips to launch the [Effect/Overlay Properties] window. The Preview Panel screen will switch to [Track Clip Mode]. Now, the playback head in the timeline will be moved to the front of the clip, and it will be deactivated
frame will be created for the selected clip. Double click text/object clips with the mouse to launch the [Edit Properties] window. Or double-click other clips to launch the [Effect/Overlay Properties] window. The Preview Panel screen will switch to [Track Clip Mode]. Now, the playback head in the timeline will be moved to the front of the clip, and it will be deactivated ![]() . When the effect property is set, you can use the playback head of the preview panel or the keyframe control playback head to move the playback head.
. When the effect property is set, you can use the playback head of the preview panel or the keyframe control playback head to move the playback head.
2. Move Clip
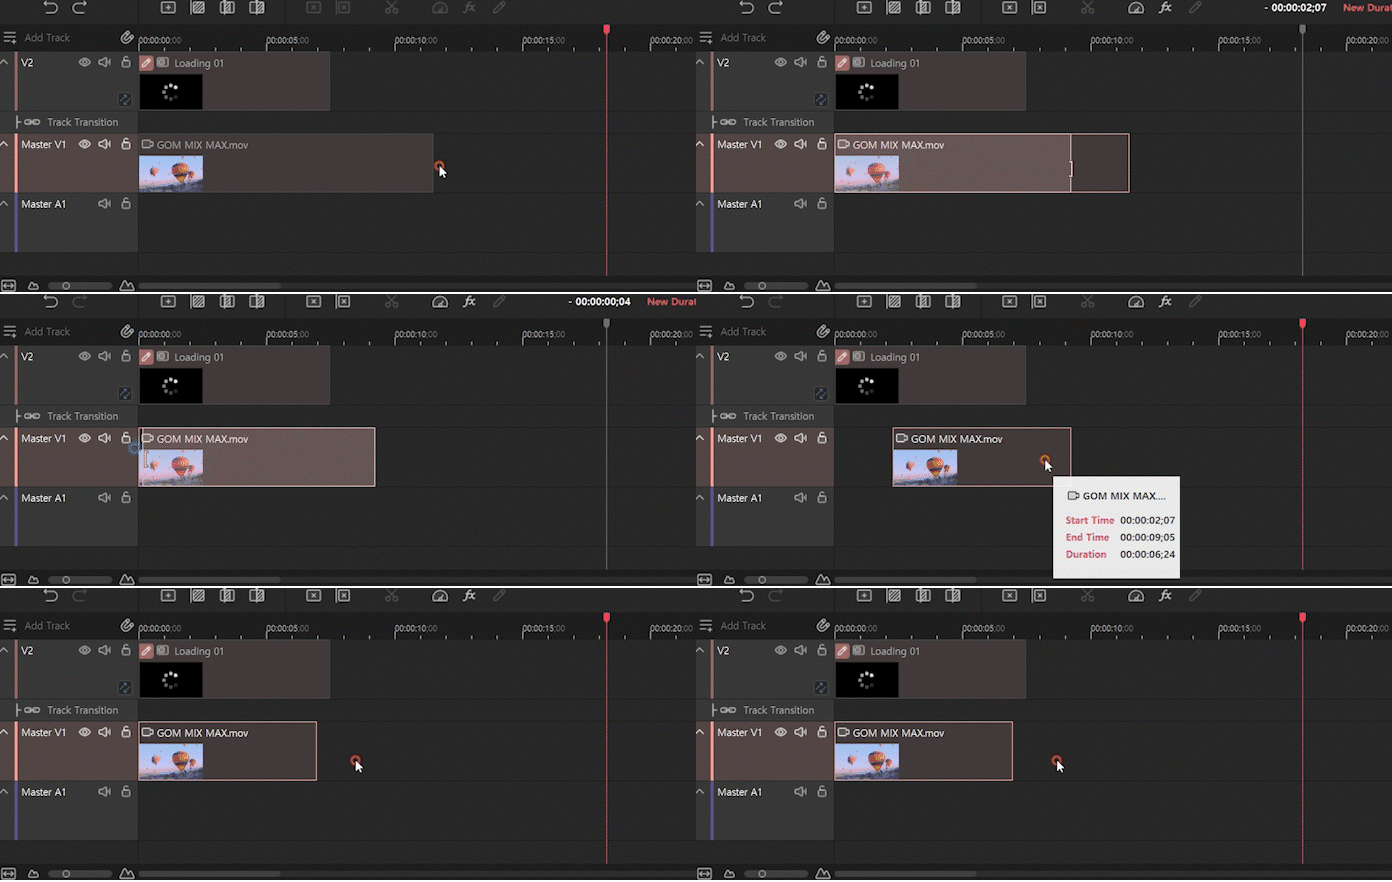
You can move a clip by dragging it with the mouse while pressing down with the left mouse button. If there is space for clip insertion, then the red edge will be displayed. If you drop the mouse pinter there, it will be moved to the position. If there is no space, then it is not moved or inserted. First, select the clip to move if you want to move or copy a clip, text, or image that can be moved between tracks but has no audio information or a selected clip between the front and rear of the adjacent clip or to the position with no sufficient space. Press ![]() or copy it. And move the playback head to the new position and paste it.
or copy it. And move the playback head to the new position and paste it.
3. Cut/Copy/Paste Clip
The clip selected in the timeline area can be cut, copied, or pasted by using the timeline toolbar or using the menu that appears after right-clicking with the mouse. Once a clip is cut or copied, it will be moved or copied to the paste menu. The paste is either copying it while pushing the clips in the back or overwriting it. It is copied to the position of playback head for the selected track. If the playback head is in the middle of the clip, then the clip will be cut before it is inserted or it will be overwritten. Press the right mouse button to “Paste on Mouse Position” then it will be copied to the position of the mouse cursor.
4. Control Clip Duration
Adjust the length of video/audio clip with trimming. Move the mouse pointer to the start or end of the clip to activate the front/rear selection area of the clip. Click it with the mouse and move to the left and right to change the clip length. When making an adjustment, refer to the clip duration information displayed in the right area of the timeline toolbar. For fine-tuning of length, increase the zoom ratio in the timeline sufficiently before making an adjustment.

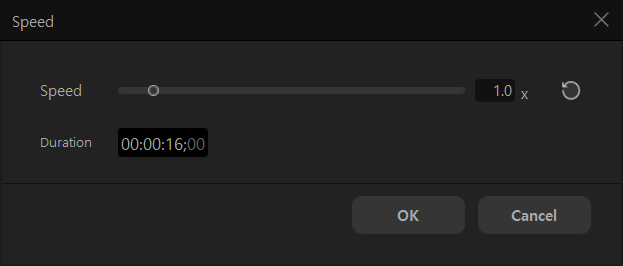
[Speed] In the setup window, you can change the clip duration. If you increase the speed, then the clip length will be shortened and if you reduce the speed, the clip length will be extended.

| Speed | It is the speed setting for a video clip. If you change the speed, then the duration will be automatically changed. |
|---|---|
| Duration | It is the playing time for a clip. If you change the duration, the speed will be automatically changed. |
If you want to play it twice slower, set the speed to 50%. Speed slows down, so the duration is increased by 2 times. If you want to play it twice faster, set the speed to 200%. Speed will go up, so the duration is decreased by 2 times. On the contrary, you can change the duration to change the speed. If the clip is extended due to the speed adjustment, then it will not be overwritten, but extra lengths will be trimmed out.
5. Mute Clip
After selecting a clip, right-click with the mouse button > mute is selected to display ![]() at the bottom of the clip. If you select mute one more time, mute will be removed.
at the bottom of the clip. If you select mute one more time, mute will be removed.
6. Effect Properties
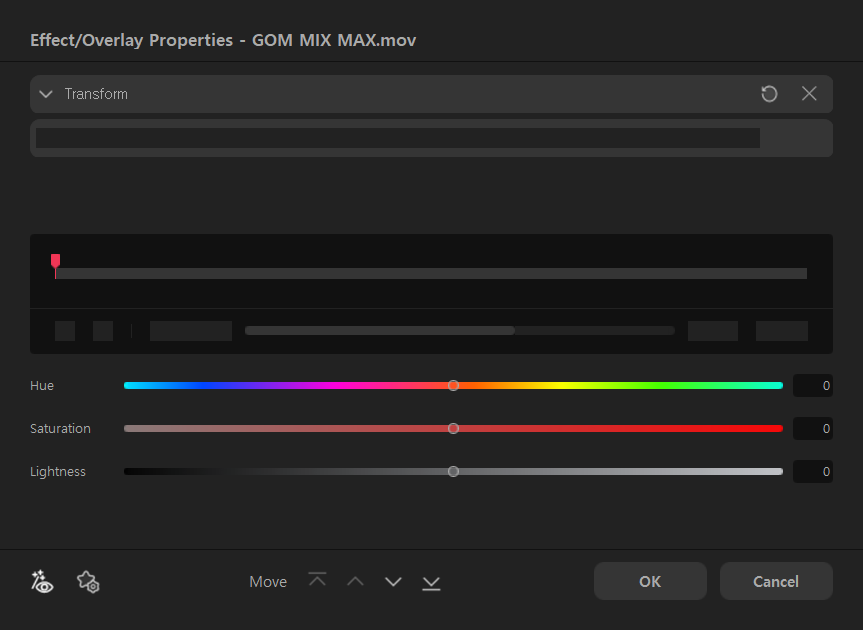
Show the list of effects applied to the clip. Change or delete the properties for each effect or change the orders.

|
|
Select an effect. If selected, the effect property window will be opened. |
|---|---|
|
|
Change the order of effects. To top/up/down/bottom |
|
|
Reset the propertyd value for the selected effect. |
|
|
Delete the selected effect. |
