GOM MixUser Guide
Function Learning
Keyframe
1. Keyframe

Videos are created in frames, the smallest unit of image screen.
In order to give that animation effect, you must change the properties, such as the size of a frame or the location between the frames. But first, you must set the standard value of the properties change, and this designated frame is called the 'keyframe'.
You have to set at least two keyframes (start keyframes and end keyframes) within a clip in order to manage it in the desired style.
You need to change the property for the start and end keyframes if you want the animation to operate with the changed properties. If you add a keyframe at the middle or front/rear, depending on the keyframe properties, different animations will be played. Speed is adjusted differently between the start keyframe and the end keyframe depending on the motion graph set. For example, in the case of the linear motion graph function, as the time value is increased, the property value is changed accordingly.
Keyframes are mostly designed in [Effect] and some of them are used in [Object] clips.
The following effects support keyframes: transformation (position, size, rotation, opacity), perspective XYZ rotation, pan & zoom, color/saturation/brightness, trim path line/rectangle/circle, rectangle zoom, screen blur, rectangle/circle/4 points mask and audio gain effects.
2. Designate Keyframe
Once you understand how to set keyframes, you can apply various animation effects.
Let us try to set the keyframe.
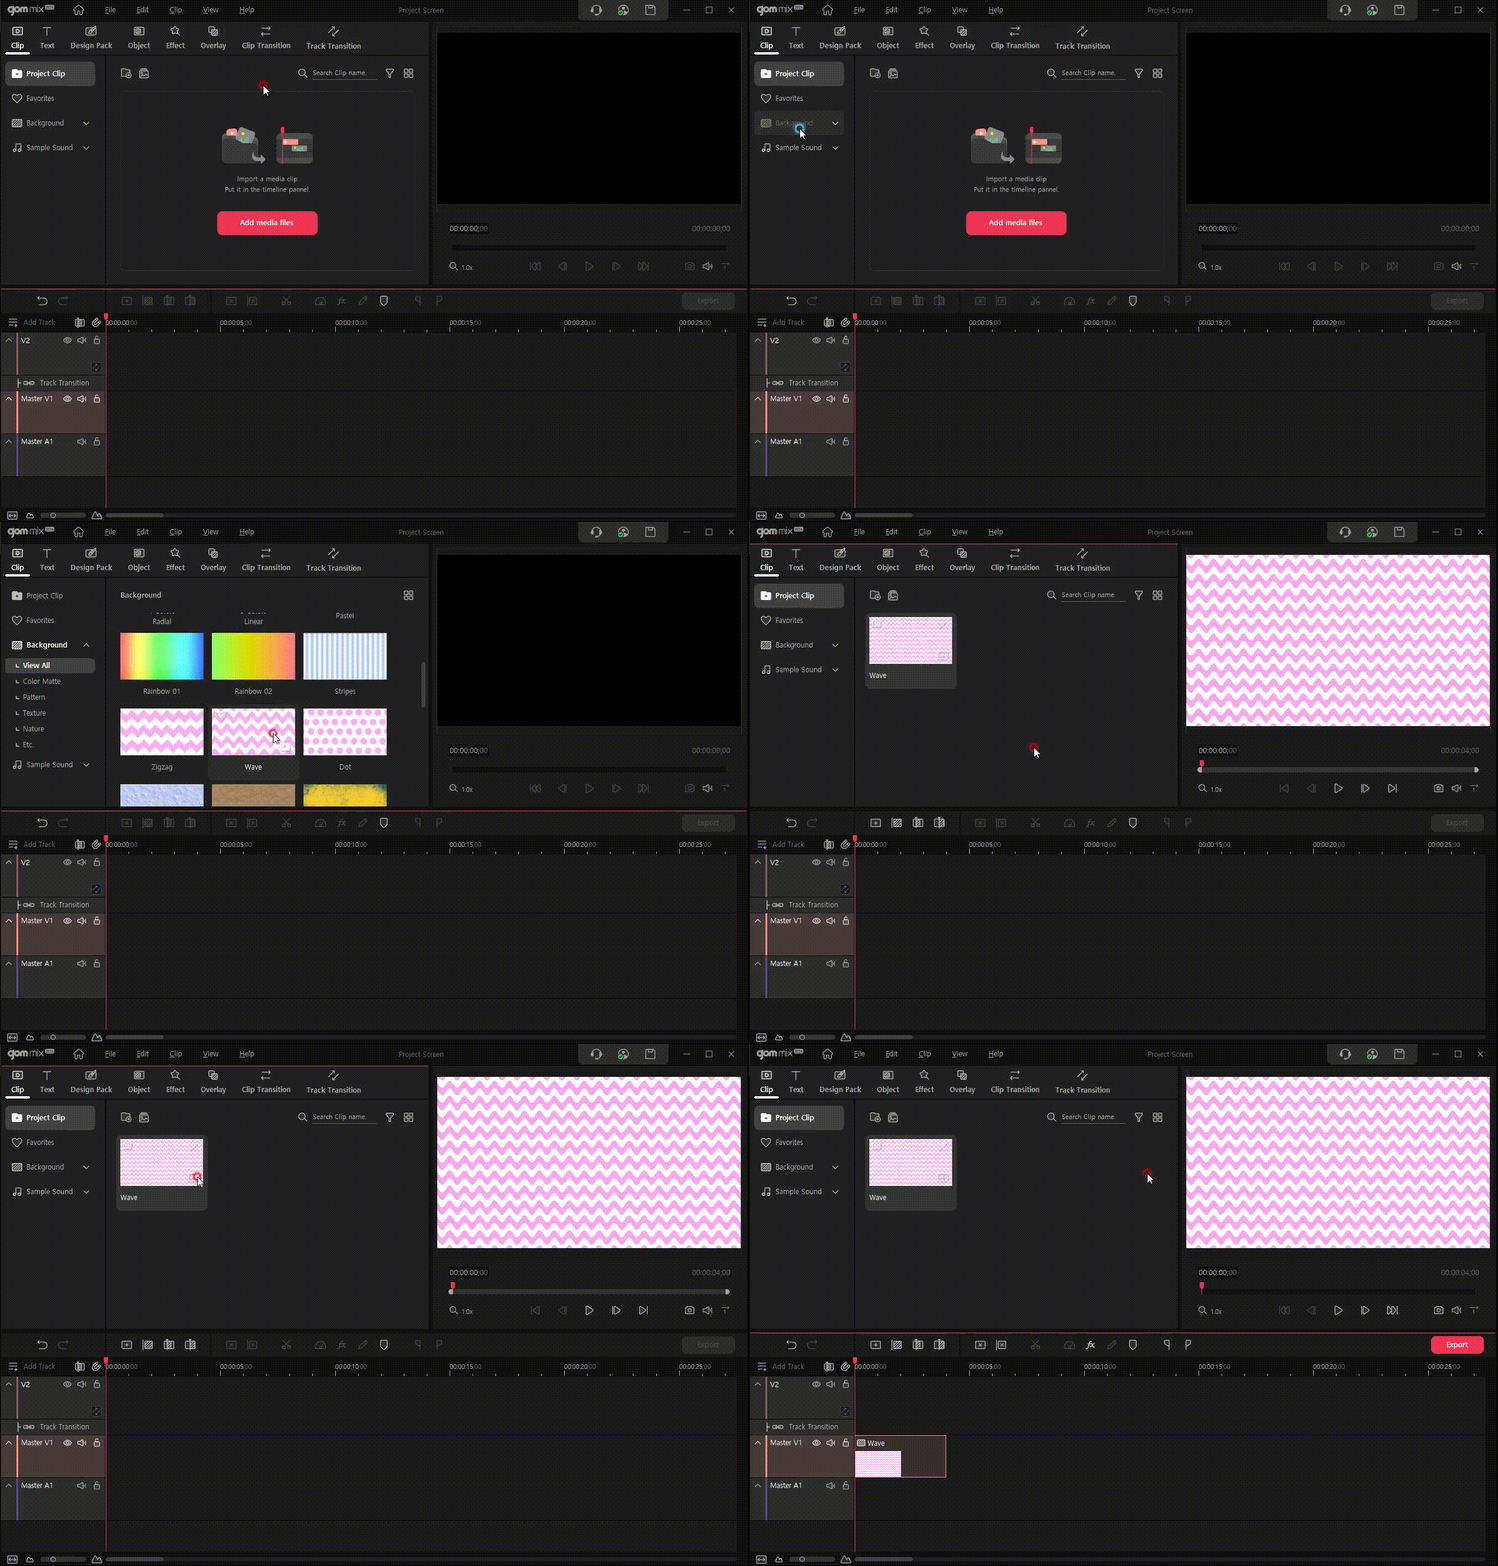
Insert a background clip into the timeline and let us try to make an animation in which this background clip grows from size 0% to 100% in two seconds.
-
1.
First, make a background clip and insert it in the timeline work area.

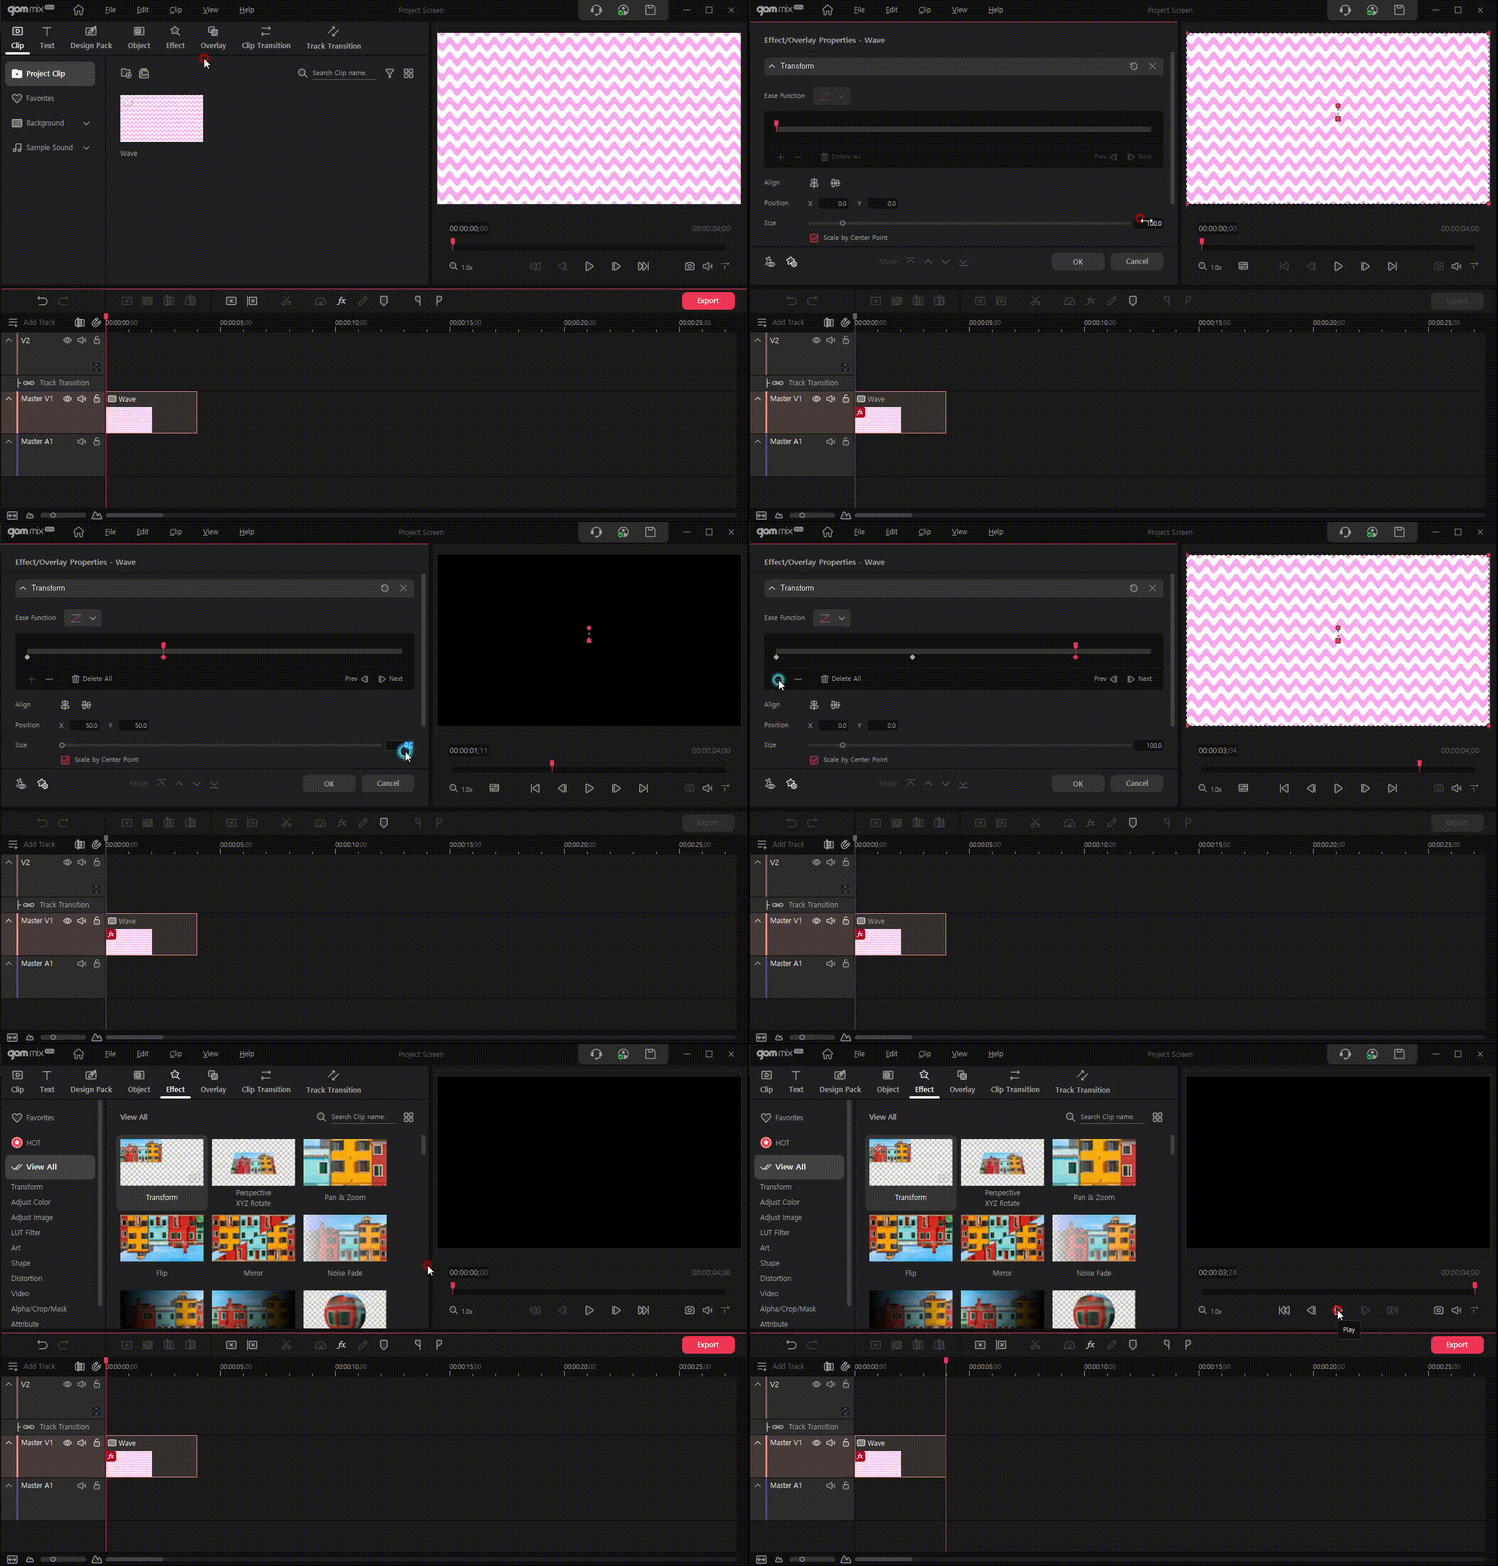
- 2. Select the background clip in the timeline and open the effects tab of the Source and Effects Panel. In the [Transform] category of the effects tab, choose the [Transform] effect.
- 3. Property window will appear if you double click a clip with effects applied. Since we want the initial size of the background clip in the [Effect/Overlay Properties] window to be 0%, change [Size] from 100% to 0%.
-
4.
In order to change the size to be 100% after two seconds, move the playhead to 00:00:02:00.
-
- Option 1 : Drag the monitor playhead of the monitor window to the two-second mark.
- Option 2 : Drag the keyframe playhead at the two second mark while looking at the time of the monitor screen.
- Option 3 : At the left bottom of the screen, click the edit control menu with your mouse and type a number (00:00:02;00).
-
-
5.
If you move the play head to the 2 seconds, the
 button for keyframe control in the [Effect/Overlay Properties] window will be activated.
Press the button to add a keyframe to the relevant frame. If you create a keyframe, a keyframe will be added for the start frame (00:00:00;00) as well.
A diamond shaped keyframe button will appear, and change the size from 0% to 100%. The keyframe property can be set at the position where a keyframe is added.
-
6.
Click on the
 button, in the preview panel to move the playhead to the front of the clip, then press the play button.
You will see that the background clip will grow in size from 0% to 100% in the span of two seconds. -
7.
Now, move the playhead to the four second mark and add a keyframe. Change the size to 0%.
If you play from the start, you will see that the clip will grow in size only to become small and disappear right after. -
8.
If you want a clip to stay at 100% for one second, then add a keyframe at 3 seconds and change the size to 100%. Play the clip, and you will see that it will grow in size and remain unchanged for one second. Afterward, it will get small again.

- 9. Try to change the motion graph to see at what speed the background clip appears. Besides, if you change rotation/opacity/position values, you can see various animation effects.
-
10.
To delete a keyframe, select a keyframe and click the
 button. To delete every keyframe, click [Delete All].
If you wish to move a keyframe, drag the to the time you wish it to be at.
-
11.
If an effect is applied to a trimmed area, the first mark of the keyframe will be changed to
 , and a record of the previously-applied keyframe effect will remain.
