GOM MixUser Guide
Source and Effects Panel
Track Transition Tab
This tab lets you add features in between the clips that are overlapped in the upper and lower tracks. It offers track transition, blend mode, and track matte features.
| Main Category | Sub Category | Remark |
|---|---|---|
| Track Transition | Dissolve/Fade | Apply a track transition effect to clip A(bottom) and B(top). Track transitions are classified into detailed categories, you can see similar types of track transition effects in each category. |
| Push/Cover | ||
| Open/Close | ||
| Wipe | ||
| Zoom | ||
| Scroll | ||
| Push/Cover | ||
| Distort/Displace | ||
| Scatter | ||
| Rotate/Swap/Curl | ||
| Blend Mode | Mix the top and bottom clips with blend properties. | |
| Track Matte | Depending on the property of the top clip, mask the bottom clip. |
Track Transition is arranged in between each clip at the upper and lower tracks.
Select the clip on top and add a track transition effect. “Track Transition Control Clip” will appear in between the tracks. The time the clips overlap is the time the track transition effect will last.
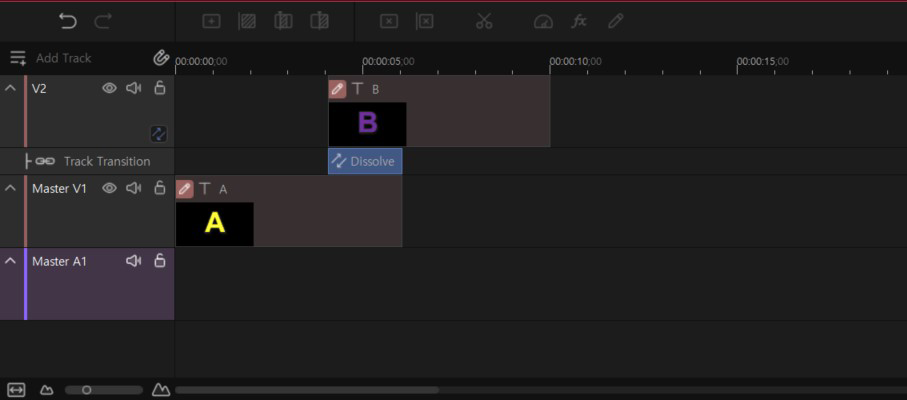
It is the duration where the length of “Track transition control clip”, You can extend and reduce or move/delete this control clip. Once the “Track transition control clip” is created and applied to the timeline, it will not be moved to the other track transition track and you cannot overlap “Track transition control clips. You can change the property of “Track transition control clip” only in the same category. If you want to change the property to other categories, delete the “Track transition control clip” and set it again.
1. Apply Track Transition
Create a video transition effect between the two tracks at the top/bottom.
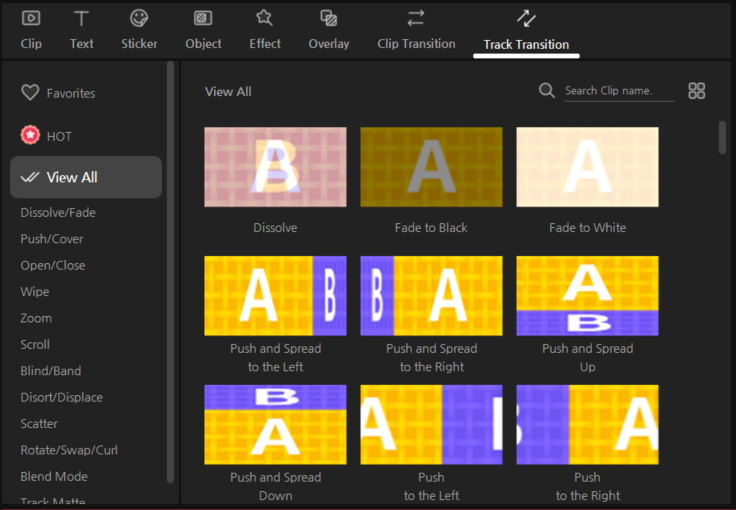
Track transition makes a transition from the bottom clip to the top clip. The bottom clip is “A clip” and the top clip is “B clip”. If the position of clips to transit is switched(when transiting from the top clip to the bottom clip), go to the Track Transition Property setting and check Shift Screen (A↔B).
Let me explain how to set the dissolve track transition to two clips with the duration of 10 seconds in an easy way.
-
1)
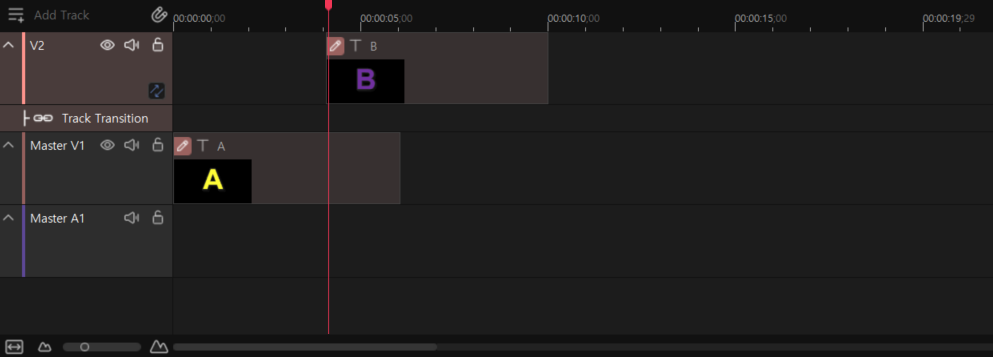
Let the clips in the top and bottom tracks overlap with each other as long as the duration of track transition. By default, the track transition time is 2 seconds. Select the top clip and press the
 ,
,  button at the preview panel to move the playback head to the front of the top clip.
-
2)
Go to the Track Transition tab and select the “Dissolve” effect under the “Dissolve/Fade” category.

-
3)
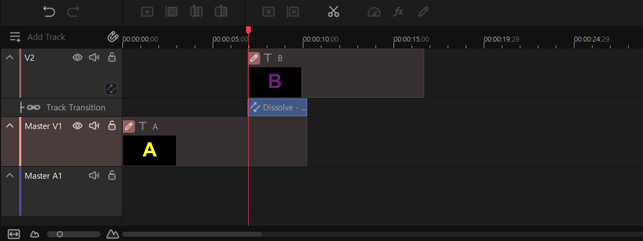
Enter the Track Transition Property Setting to see the “Track transition control clip” between the transition tracks or video tracks of the timeline panel.
-
4)
This is the “Dissolve” effect dialog box. You can apply a track transition effect after selecting a clip in the timeline panel to apply.
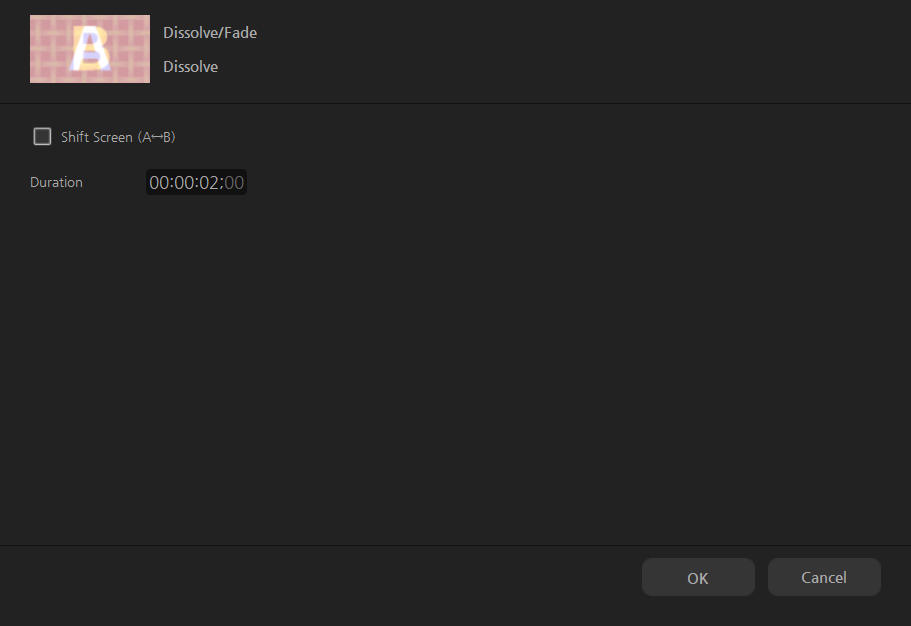
“Dissolve” effect dialog box Shift Screen (A↔B) Check it to let the track transition proceed from the top clip to the bottom clip. Duration It is the lasting duration of track transition.
Once the time is modified, the length of the “Track transition control clip” is changed. - 5) After changing the properties, move the playback head to play it. If a track transition is done successfully, then press the “OK” button to apply a track transition.
To create a video transition effect, move the playback head to the front of the transition clip and select the clip at the top and set the desired track transition type. If no clip is selected, the transition effect cannot be applied. Once the transition effect is applied, there will be track transition controls between tracks. You can adjust the length of track transition control to change the transition time.
2. Blend Mode
Generally, if videos and images overlap below and above the track, the top clip will hide the view of the bottom clip; thus it is impossible to see the clip at the bottom track without giving an opacity level. Blend effect shows a mixture of these two overlapping clips based on each color property and this action is called Blending. In the Track Transition tab, select the blend mode category to show various blend effects.
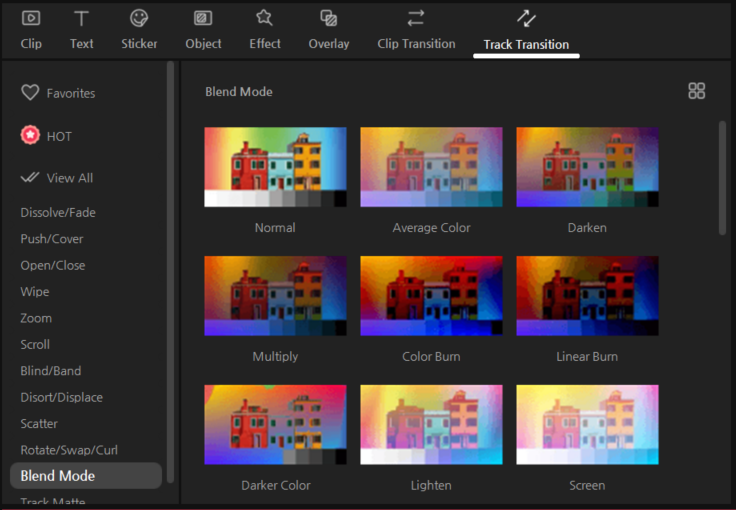
Blend mode is used to select a clip at the top and blend clips at the bottom.
Let us explain how to set the blend effect called “Screen” on two clips with a duration of 10 seconds in an easy way.
-
1)
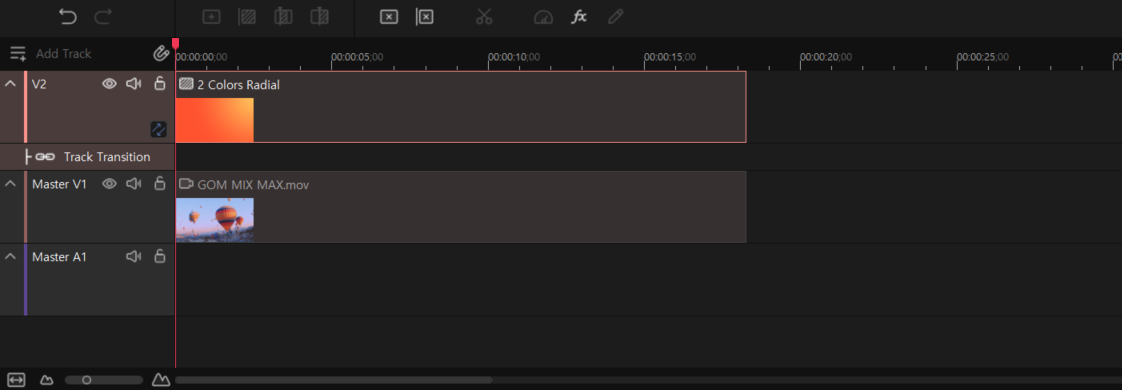
At the top/bottom tracks, place overlapping clips lasting as long as the blending time. The duration of the blend is set to 2 seconds by default. Select the top clip and press the
 ,
,  button at the preview panel to move the playback head to the front of the top clip.
-
2)
Move to the Track Transition tab to select the “Screen” effect in the “Blend Mode” category. The blend mode effect requires that the clip to apply is selected in the timeline panel.

-
3)
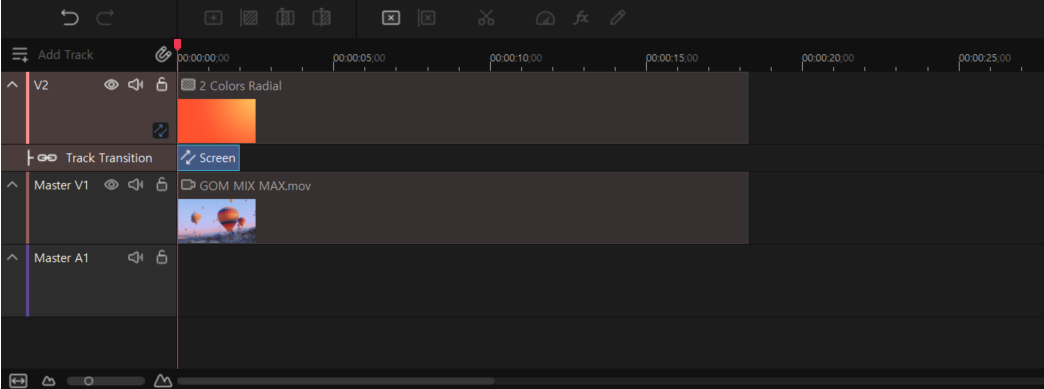
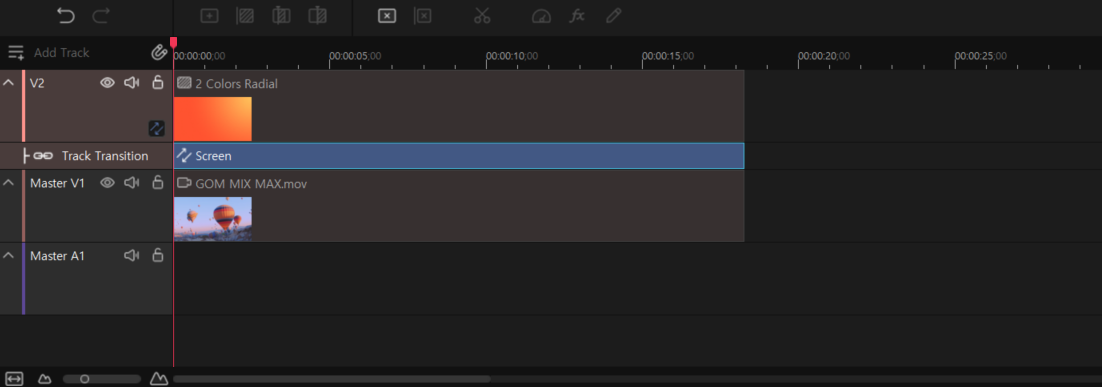
Enter the “Screen” Property Setting to see the “Track transition control clip” between the transition tracks or video tracks of the timeline panel.
-
4)
This is the “Screen” effect property setting.
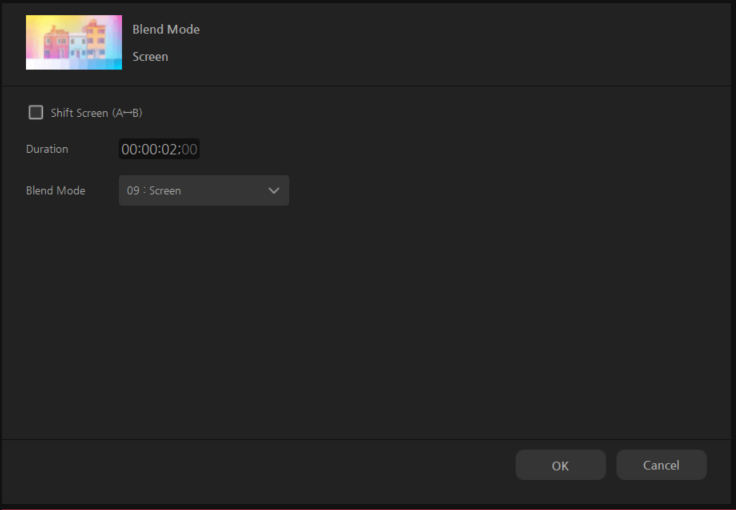
“Screen” effect property setting Shifts Screen (A↔B) Check it to change the reference clip for blending the top and bottom clips. Even if you change the reference clip for some blend effects, the same effects will remain. Duration It is the time duration for blending to be applied.
Once the time is modified, the length of the “Track transition control clip” is changed.Blend Mode You can change the blend effect to other effects. -
5)
Since the default duration is 2 seconds, the length of the “Track transition control clip” in the timeline panel is set to 2 seconds.

-
6)
In the blend mode property setting, change the duration to 10 seconds. If you change the duration to 10 seconds, then the length of the “Track transition control clip” in the timeline panel is also changed to 10 seconds.

-
7)
After changing the properties, use the preview panel to check the blending results. If desired results are obtained, then press the “OK” button to apply a blend.
3. Track Matte
Depending on the property of the clip at the top track, mask the bottom video in timeline stacks to hide or show. Track Matte is a mask function to place a matte on the track to show or hide the clip at the bottom depending on the brightness or alpha value. Track Matte is largely classified into Alpha Matte and Luma Matte.
| Alpha Matte | If the alpha channel pixel value is one, it is non-transparent, and if 0, then transparent. If the alpha value is 0, then the below track’s clip is displayed and if 1, it will not displayes |
|---|---|
| Luma Matte | If the pixel’s color value is black, it is opaque and white, it is transparent. If it is white, the clip of the track below will be shown, and if it is black, it will be hidden. |
Activate the track matte if you want to see another layer through the hole defined for a single layer. For example, you can use a text layer as a Track Matte of video layer to only allow displaying of video through the shape defined by text characters. The basic layer(paint layer) is used to retrieve the opacity value from the specific channel value(alpha channel or pixel intensity) for a Track Matte layer.
Luma Matte is useful when you want to create a new Track Matte by using a clip that has no or cannot create alpha channels defining the opacity of a clip.
If Alpha Channel Matte is used, or if Luma Matte is used, in both cases, higher pixels offer higher transparency. Generally, if you use a high contrast matte, the matte area will be completely transparent or non-transparent. Mid-level shade should be placed only in an area requiring partial or gradual non-transparency, such as soft edges.
