GOM MixUser Guide
Export
Export
1. Export video
Click on Export to make a video out of the clips you have worked on timeline.
Use “Export” in the file menu to set the Export setting.
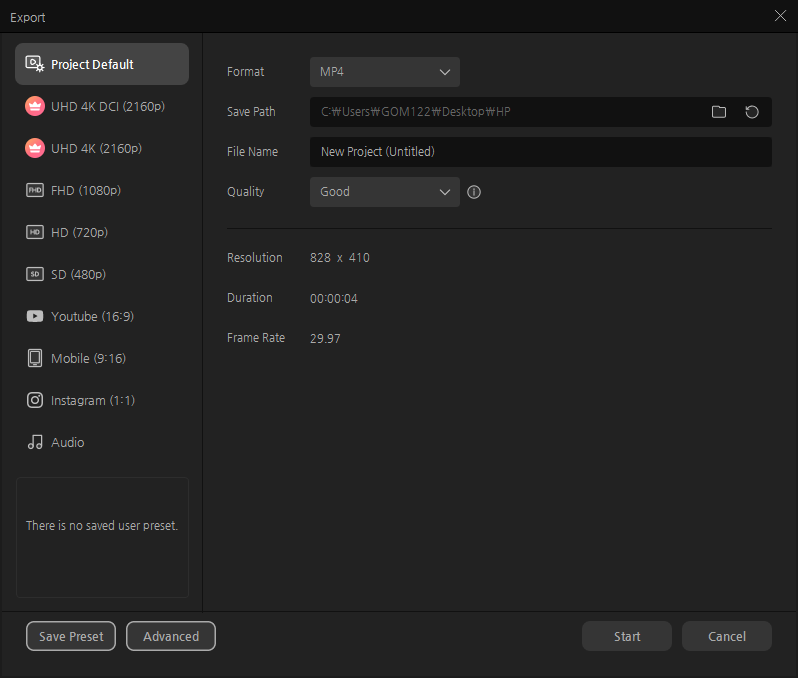
Export setting sets the video format, name, resolution in the quality category. Besides the preset for each resolution (1080p, 720p, 480p), it also provides YouTube, mobile and Instagram presets. You can select a setting in the preset and you can add your preset with your own setting. Project default will show the initial setting made when starting the project.
| Format | Set a format of video to be encoded. The supported formats include: generally used H.264 (MPEG-4) format called MP4 and flash video file format, FLV. |
|---|---|
| Save Path | It is the location of the folder where the video is encoded and saved. The default folder is used to retrieve the path set in environment settings. |
| File Name | It is the name of the video to be encoded. By default, the file name format is in “Project filename_export setting”. [Export Setting] can be changed in [Settings] |
| Resolution | Means the number of pixels in the horizontal and vertical direction. |
| Duration | It is the playing time of the video to be encoded. |
| Frame Rate | It is the number of screen frames per second. 25 fps means that the video is made of 25 screen frames per second. |
| Quality | Controlling the quality means that the bitrate capacity set to the screen is controlled. Generally, the higher the bitrate is, the better the quality. But also the storage capacity of memory for encoding and decoding is increased as a result. It is composed of 3 levels - Very Good/Good/Fair. |
The resolution frame count is used to retrieve the setting for the initial [Project Settings] and click the [Advanced] button to change the detailed setting.
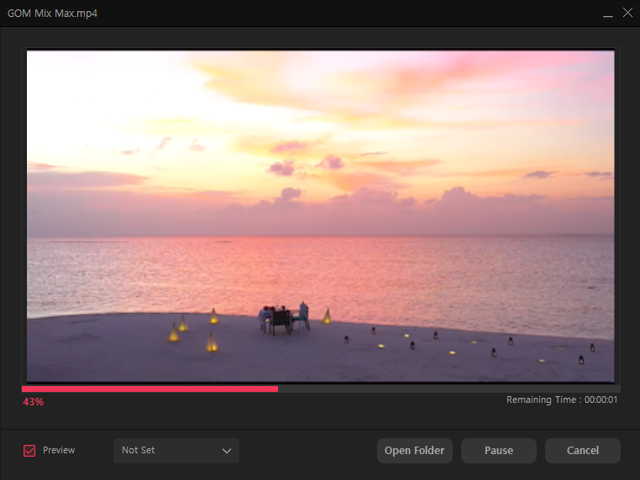
Once the encoding is finished, the 'Play' button will show up.
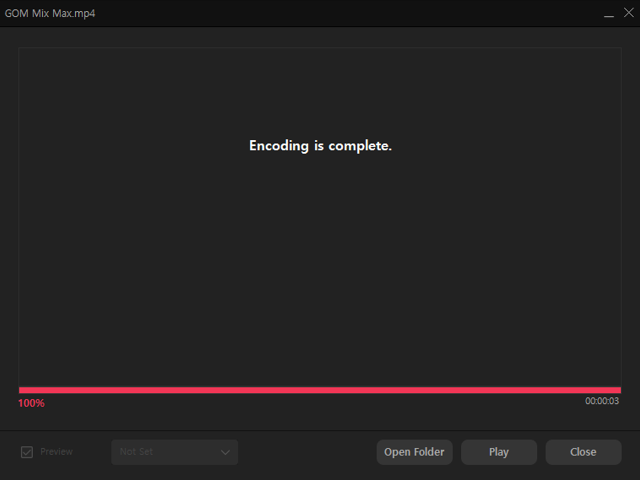
| Preview | Encode the video to be exported while watching the screen. |
|---|---|
| Open Folder | Open the folder where the video to be encoded will be saved. |
| Play | Play the encoded video in a default video player. |
| Close | Close the encoding dialog box. |
2. Export Audio
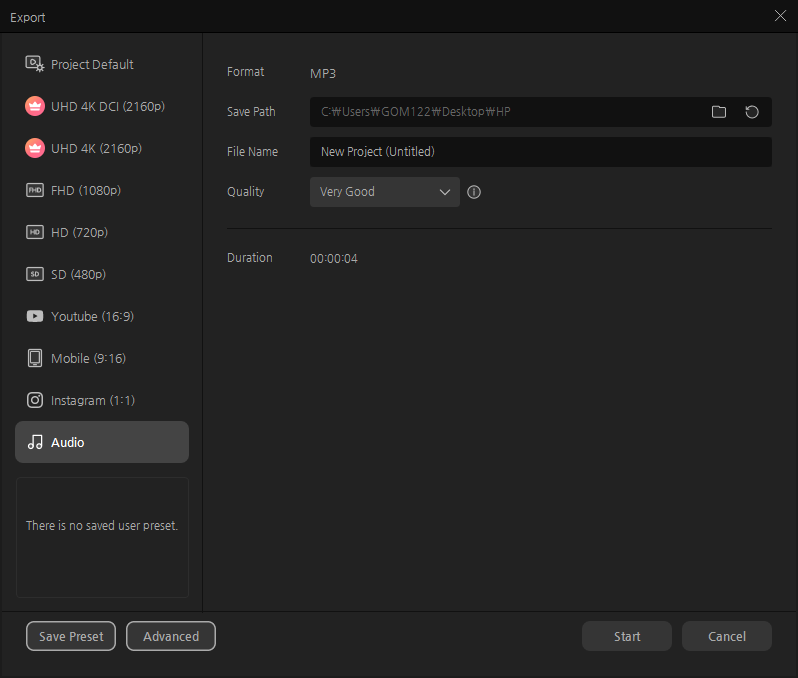
You can make edited videos or audio clips as Audio files. When exporting, click [Audio] from the preset menu. The format of the [Audio] preset is set to MP3. Audio quality can be selected as Very Good [256 kbps], Good [192 kbps], and Fair [128 kbps]. After confirming the settings, click [Start], and it will be exported to an audio file. Detailed settings can be adjusted in [Advanced].
3. Partial Export
1) Export Selected Area
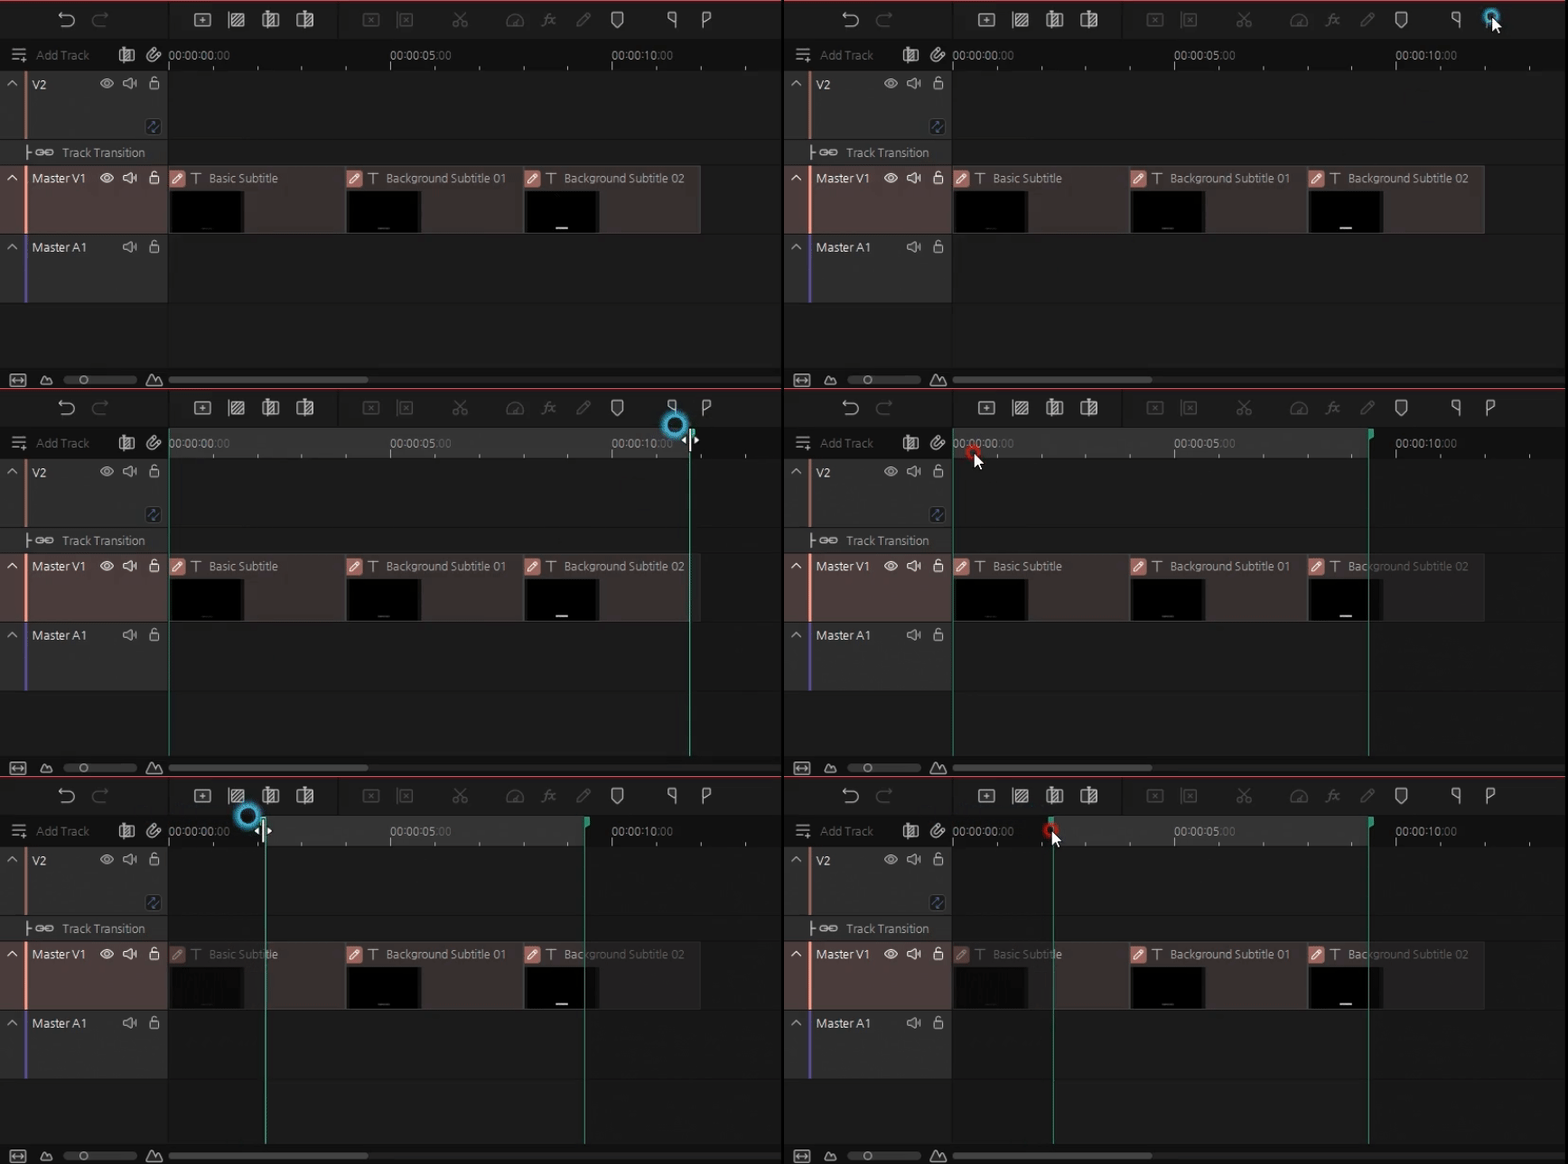
You have an option to restrict and export a specific area on the timeline.
-
Select Area
There are two ways to mark start/end point of the area
- Option 1. Click
 or
or  on the timeline menu bar.
 - Option 2. Right-click on the track and choose 'Mark starting point' or “Mark end point.”
Select Area  or “Mark starting point”
 A starting point bar  will appear at the position of the playhead on the timeline, and an end point bar
  will appear at the end of the entire clip.
 or “Mark end point”
 An end point bar  will appear at the position of the playhead on the timeline, and a starting point bar
  will appear at the beginning of the entire clip.
 - Option 1. Click
-
Adjust Selected Area
There are two ways to adjust selected area
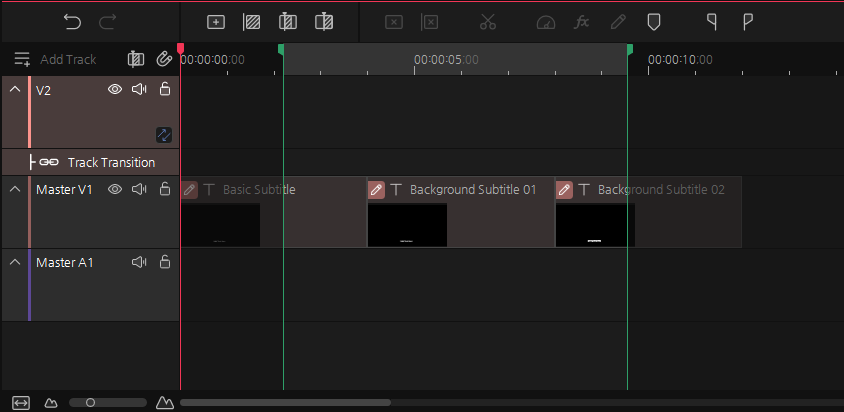
- Option 1. Drag green-colored point bar on the timeline.
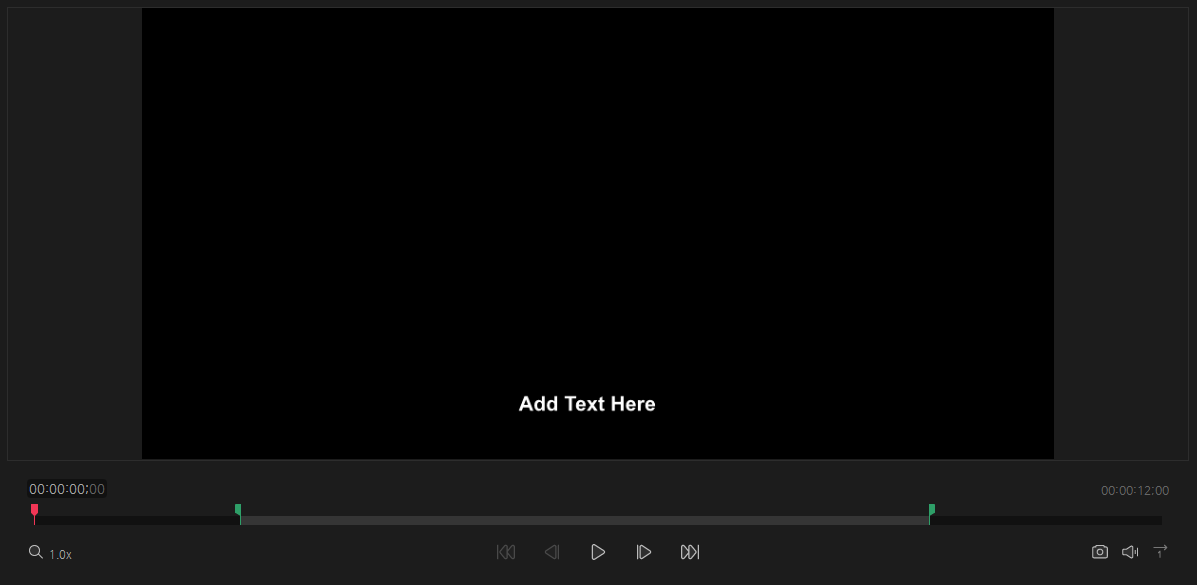
- Option 2. Drag green-colored point bar on the preview panel.
When you press the space bar or play button, it plays only the selected area.
- Option 1. Drag green-colored point bar on the timeline.
-
Unmark Selected Area
There are two ways to unmark selected area
- Option 1. Right-click on the track then choose “Unmark selected spot.”
- Option 2. With the timeline selected, press Esc
-
Export Selected Area
Exporting the selected area is the same as "Exporting a video." Once the area has been selected on the timeline, click "Export" on the menu bar above the timeline to export.
2) Export Selected Clips
You can export only a specified clip on the timeline.
-
Export Selected Clips
There are two ways to export selected clips.
- Option 1. Right-click the clip then choose “Export Selected Clips.”
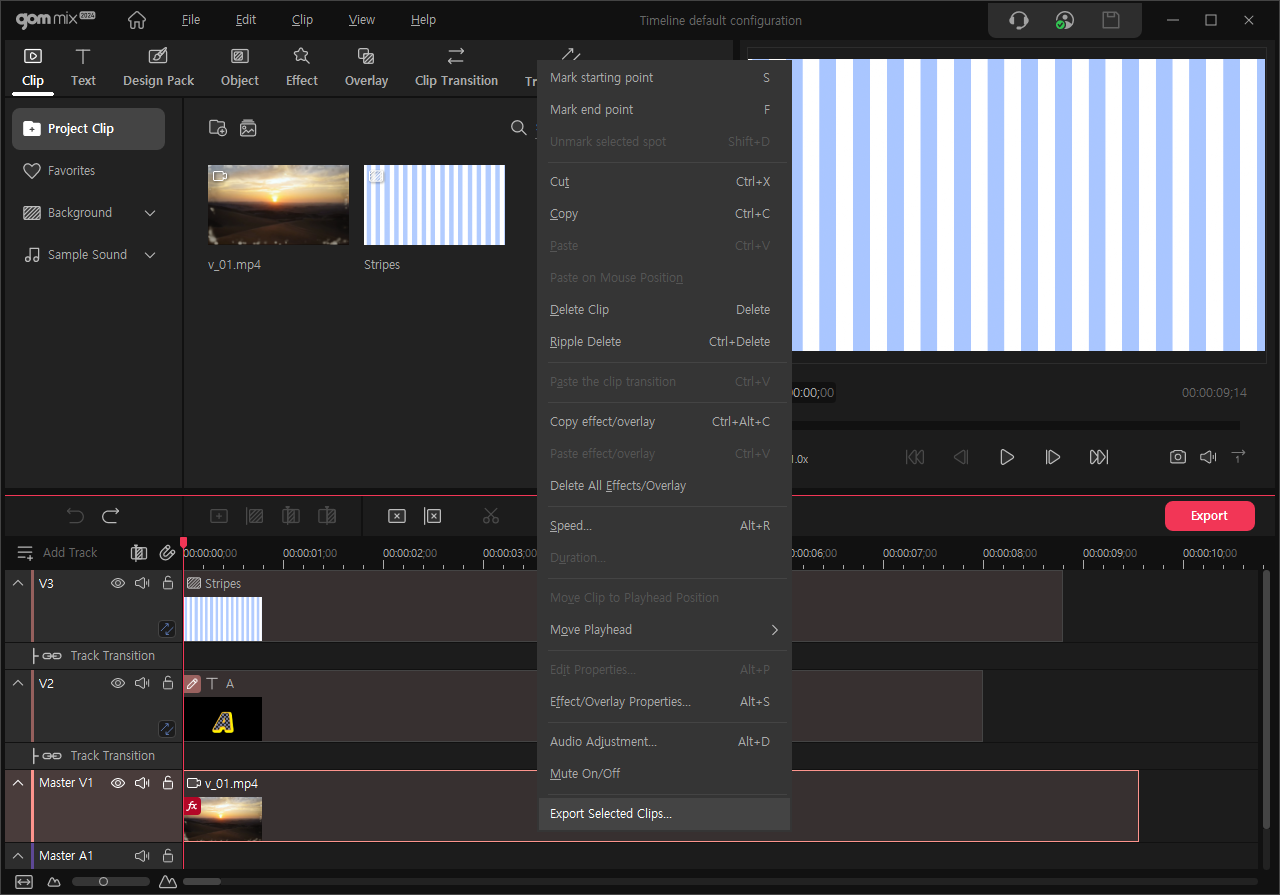
- Option 2. With the clips selected, click [File] > [Export Selected Clips].
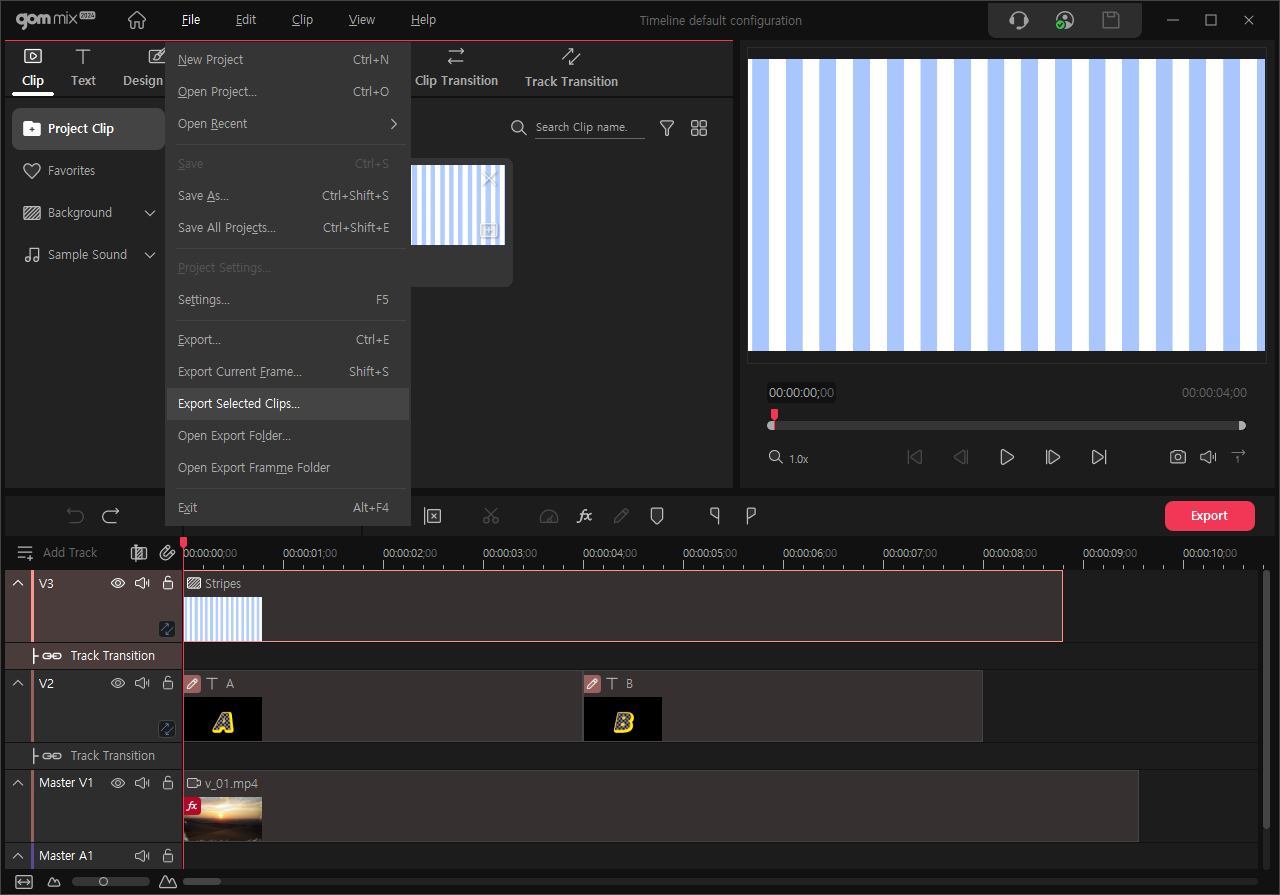
- Option 1. Right-click the clip then choose “Export Selected Clips.”
