GOM MixUser Guide
Source and Effects Panel
Clips Tab
You can upload or make clips. It is composed of four categories.
1. Projects Clip
It shows the list of the source clips that are used in the project file.


| Import Media Clip (Video/Audio/Image) |
|
Import media clips(video clips, audio clips, image clips) to the project clip list. Import Media Clip dialog box will appear and the selected clips will be registered in the project clip list. Press the Shift/Ctrl key to select multiple clips and import all at once. |
|---|---|---|
| Create Motion Image Clips |
|
Make [Motion Image Clips] to set appear/disappear animation and properties. In the Import dialog box, select an image clip to apply. The Image Property Edit window will appear. After changing size, coordinates, appear/disappear, etc., press the [OK] button to register it in the project clip list. |
| Search | Enter the search keyword in the search bar and press the Enter key to find only the project clips with the keyword. | |
| Filter | Click the category view icon to collect and view desired clips according to your clip style. | |
| View | You can change the way to view project clips. It toggles in the order of Large Thumbnail View, Thumbnail View and List View. | |
(1) Import Media Clip
The function is used to import a clip into the project clip list. Press the ![]() button or go to the top bar menu: [Clip] and select [Import Medial Clip] to launch the file browser to import a clip. Once you choose a clip and click on the [Open] button, it will be added to the project clip list. If you want to import multiple files simultaneously, hold down the Shift or Ctrl key, make multiple selections, and press the [Open] button. Or, you can select a clip in the PC file browser and drag and drop it to the project clip window.
button or go to the top bar menu: [Clip] and select [Import Medial Clip] to launch the file browser to import a clip. Once you choose a clip and click on the [Open] button, it will be added to the project clip list. If you want to import multiple files simultaneously, hold down the Shift or Ctrl key, make multiple selections, and press the [Open] button. Or, you can select a clip in the PC file browser and drag and drop it to the project clip window.
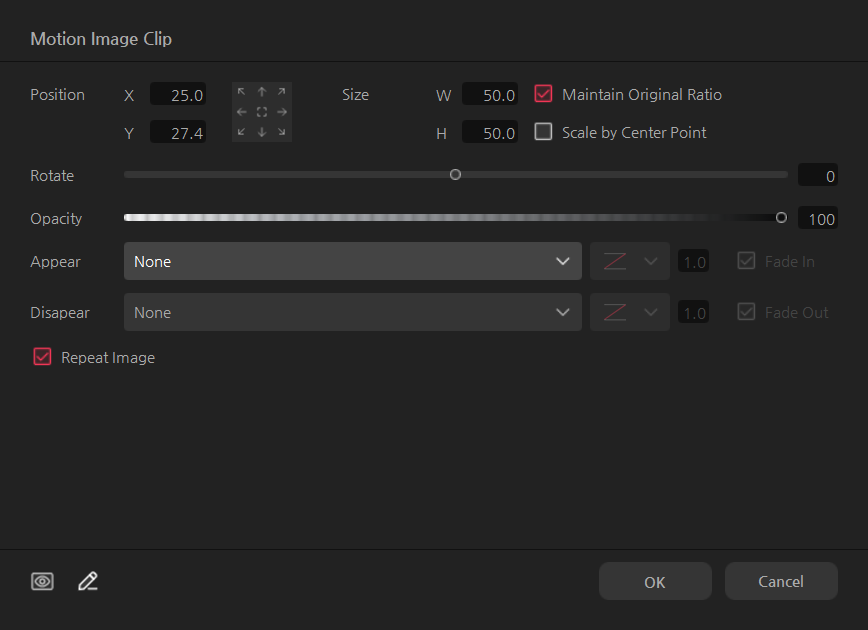
(2) Create Motion Image Clip
You can use the function to create appear/disappear animation effects to an image clip or set size, position, and rotation properties ahead of time to create an image clip.
Press the ![]() button or go to the clip menu: [Create Motion Image Clip] to launch the file browser to import a clip. After selecting an image clip, press the [Open] button to launch the property edit window to create a motion image clip. After designating size, position, rotation, and appear/disappear properties, press the [OK] button to create a motion image clip. The length of motion image clip is set to [Default Duration] set in [Settings].
button or go to the clip menu: [Create Motion Image Clip] to launch the file browser to import a clip. After selecting an image clip, press the [Open] button to launch the property edit window to create a motion image clip. After designating size, position, rotation, and appear/disappear properties, press the [OK] button to create a motion image clip. The length of motion image clip is set to [Default Duration] set in [Settings].

|
Move the text frame to one of the 9 areas set ahead of time. |
|---|---|
| Position | It is the X/Y coordinate for the top left of frame control displaying a clip. |
| Size | It is the size of the clip. Unit is in '%' 100% means the same resolution as the one for the project clip. If [Scale by Center Point] is checked, then the size will be changed with respect to the center of frame control. If unchecked, then the size will be adjusted in the direction of dragging a 4 control points of frame control. Clip size is changed while maintaining the resolution. If the size is 100% and the position value is (0, 0), then the clip fills up the screen, and if the size is 50% and the location value is (0,0) then the half-sized clip, both width and length is placed at the left top corner. |
| Maintain Original Ratio | Change the size while maintaining the aspect ratio of the image clip. |
| Adjust View Ratio to Center | Adjust the clip size with respect to the center. Size is adjusted in 4 directions. If you release it, then the size is adjusted in the direction of control. |
| Rotate | Rotate a clip. A clockwise rotation relative to 0 degrees is specified as a [+] angle, or a [–] angle to rotate counterclockwise. The rotation values range from -360 degrees to +360 degrees. If no rotation value is specified in the keyframe, 0 degrees, -360 degrees, and 360 degrees produce the same results. |

This is an animation type for appearing motion image clips. Graph function is used to set the motion graph for the motion image clip animation. Set the time of appearing. Check [Fade In] to make them appear slowly.

This is an animation type for disappearing motion image clips. Graph function is the motion graph for the motion image clip animation. This is the time of disappearing. Check [Fade Out] to make them disappear slowly.
| Repeat Image | If checked, the animation is repeatedly displayed when the duration of the animated gif./png. clip is extended. |
|---|---|
|
|
In this mode, you can see the progress of frame animation for the motion image clip in each timeline segment. When the effect related to animation or movement is set, you can move the playback head of the monitor to see the animation status of each frame. |
|
|
In this mode, you can see the motion image clip edit properties, not the animation operating status. |
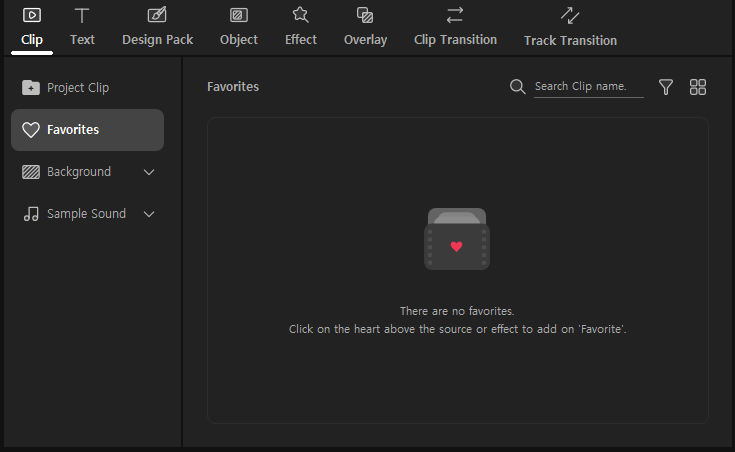
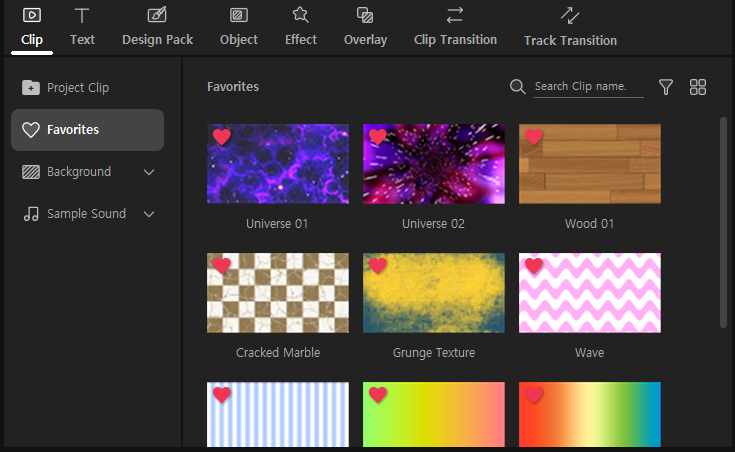
2. Favorites Clip
If you mark some of your frequently used clips here, you will be able to see them easily just by going here.
In each of the background, object, background/sound effects clip, click on ![]() the button located at top right to save them in Favorites.
the button located at top right to save them in Favorites. ![]() Click on the button again, and it will be removed from Favorites.
Click on the button again, and it will be removed from Favorites.
-
Example screen of initial My favorite clip
-
Example screen of registered My favorite clip
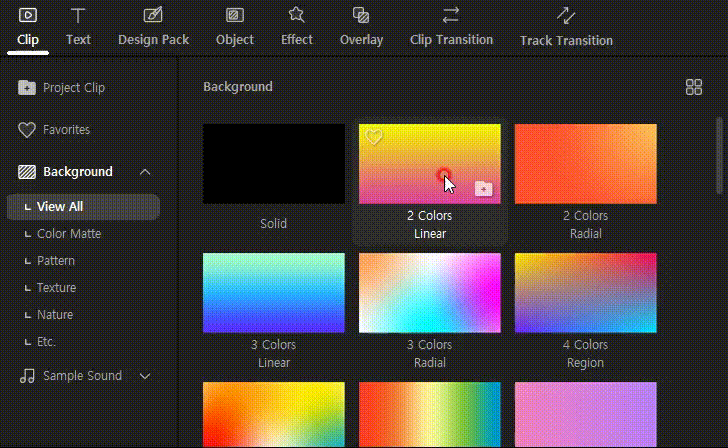
3. Background Clip
This clip can be used as a background in your video. You can change the format or property of each clip.
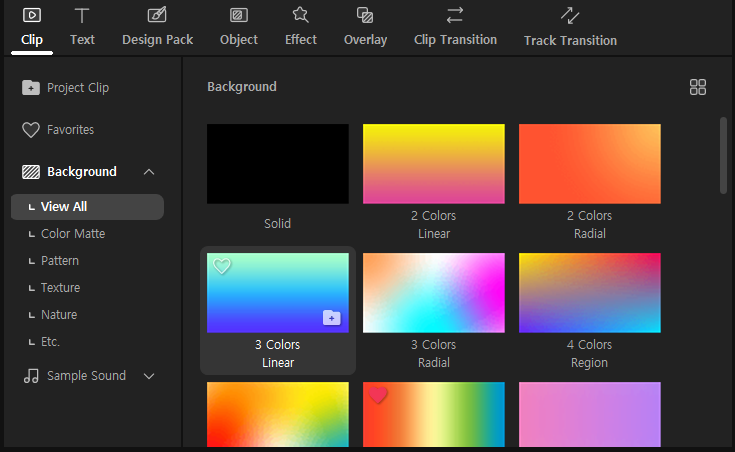
For example, if you select the “2 Colors Radial” background-clip, then the Property Setting window will appear.
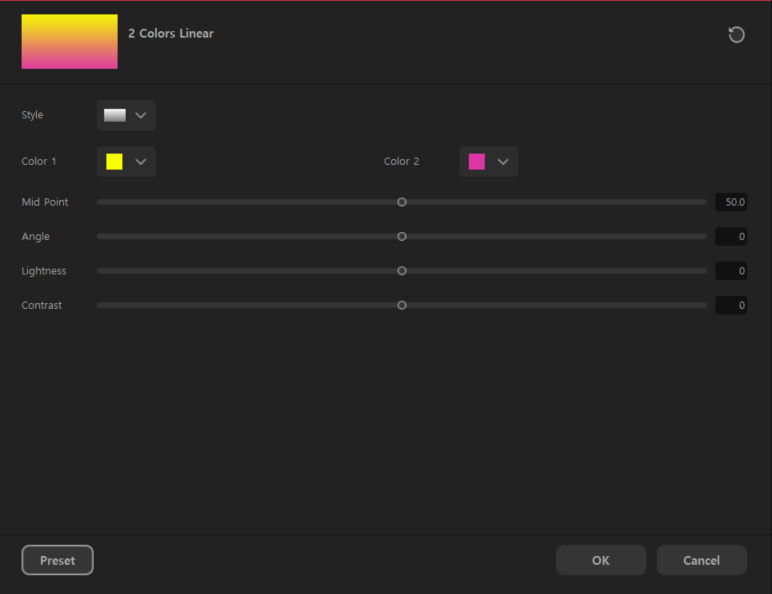
After setting variables, press the “OK” button to create a background clip.
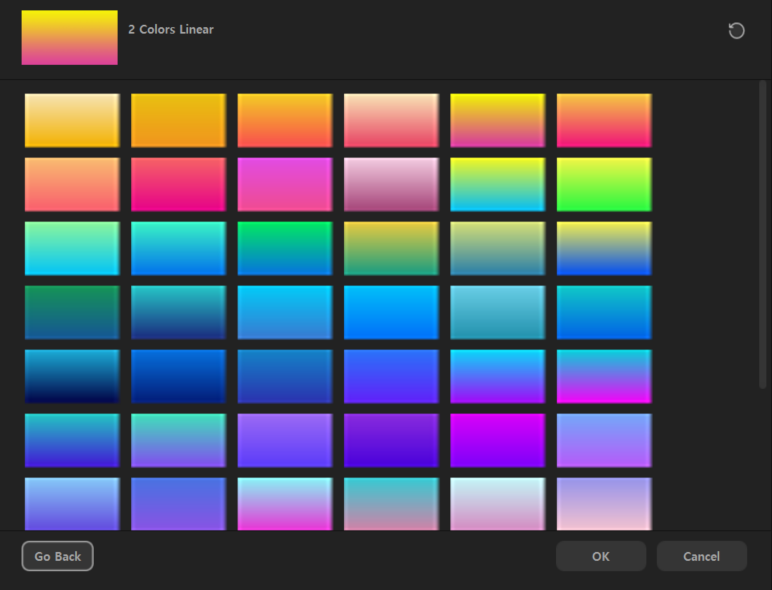
Go to [Preset] and select the type of gradation and press the [OK] button to create a clip. Press the [Back] button to return to the Property Setting window. After designating the variables in the Property Setting window, press the [OK] button to register the background clip in the project clip list.
4. Sample Sound Clip
This shows the list of the audio clips you can freely use for your sound effect or background music.
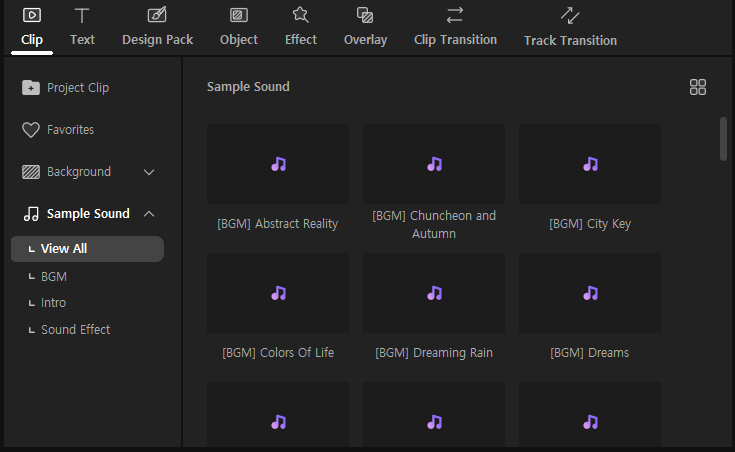
After you click on the audio clip, click on the ![]() button to listen to the audio in the preview screen.
button to listen to the audio in the preview screen.
Once you click on the ![]() button, it will be added in the project clip list.
button, it will be added in the project clip list.